The Best AI Rendering Tool for Interior Designers? Vibe3D Review
Interior design technology and AI are changing at the speed of light, and keeping up with the latest tools can feel like one more thing you just don’t have time for. Lucky for you, that’s my job. I test the newest AI tools and rendering software so I can report back on my real user experience and tell you honestly whether a tool is worth adding to your workflow, or not.
In this Vibe3D review, I’m putting this AI rendering tool to the test to see if it can take my interior design renderings to the next level, and whether it’s truly as easy to use as it claims.

Why Vibe3D Caught My Eye
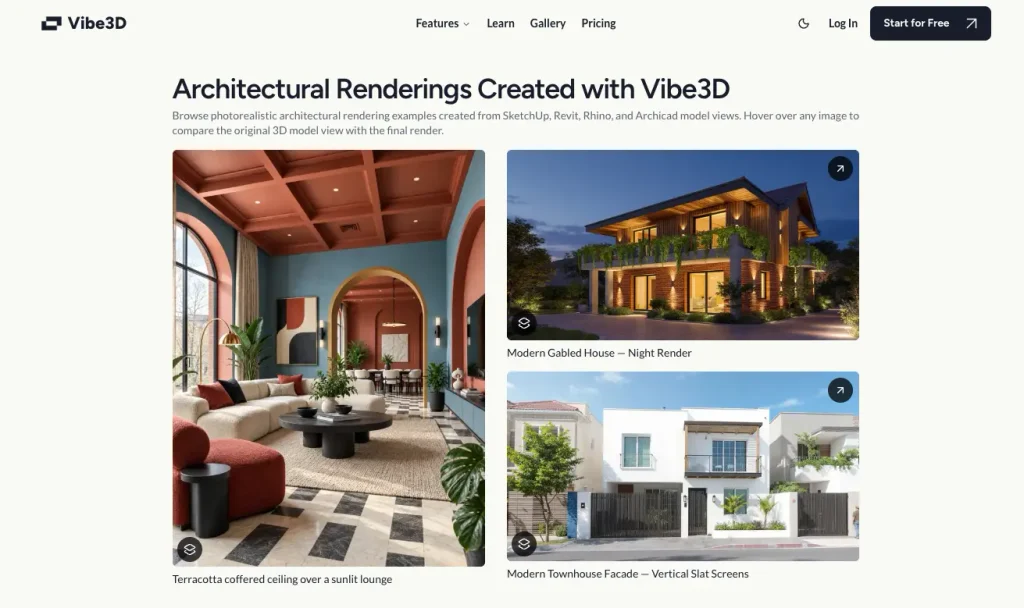
Vibe3D caught my attention for three reasons: its AI rendering capabilities, its photo-enhancing tools and its ability to create walkthrough videos from still images.
Plenty of other rendering tools promise the same things. The problem is that most of them come with a steep learning curve. I wanted to find out whether Vibe3D is something designers could actually adopt quickly, or whether it’s just another flashy AI tool with big promises that ends up unused because it’s too complicated to figure out.
And let’s face it, that’s one of the biggest hurdles with any new software. Learning a new tool and building it into your workflow can feel like a gruelling process, especially when you’re juggling client projects, deadlines and running a business.
How I Tested Vibe3D for This Review
To give this Vibe3D review a fair test, I upgraded to the Vibe3D Pro plan with one goal in mind: turning my raw 3D renders into client-ready visuals that would genuinely impress.
One distinction worth making: you cannot use Vibe3D to build the model itself. If you already design in SketchUp or another 3D modelling program, you can export your files and bring them into Vibe3D purely for rendering. Read: How to Create Photorealistic Renderings: 5 Easy 3D Tools
The Starting Point: My Raw Render
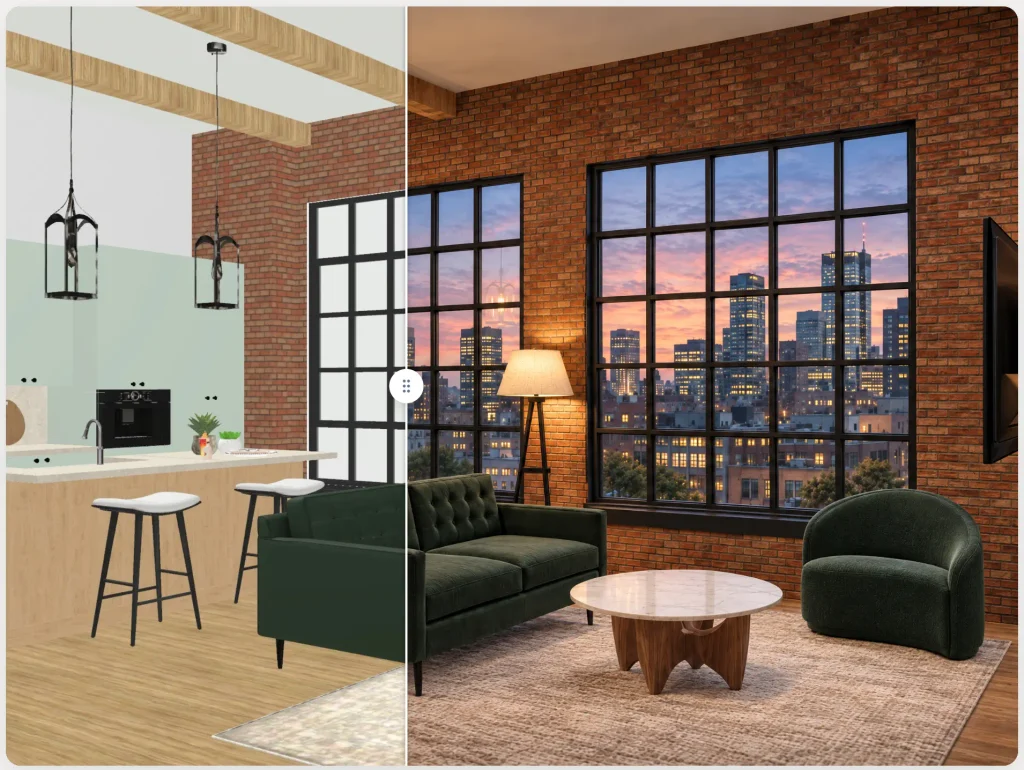
Here’s the original image I uploaded.
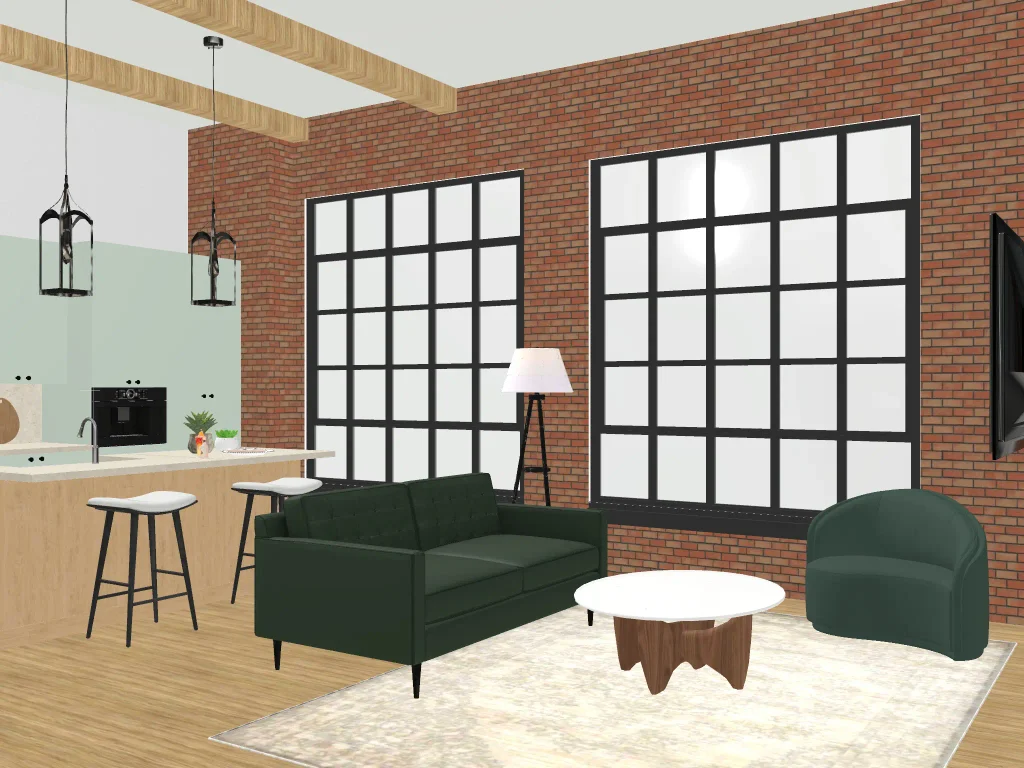
As you can see, it’s a unique-looking space with plenty of texture, including exposed brick, cabinetry and furniture, but the image itself falls flat. The lighting is lifeless; there’s no atmosphere and nothing about it tells a story. Honestly, I don’t think this visual would impress a client.
How Vibe3D Works
Vibe3D runs right in your web browser, so there’s nothing to download or install. Once you upload your image, the image settings appear, and you can choose the type of scene you want to create. Here’s what you can control:
- Lighting and time of day: switch between daytime and nighttime lighting.
- Custom AI prompts: tell the AI exactly what you’d like it to add or change.
- Rendering styles: toggle between different looks for your scene.
- People in the scene: add figures, a common element in architectural renders that gives the space scale and life.
- Scene types: create close-ups and fly-throughs, which are short videos of the space.
Everything is laid out clearly, so you aren’t hunting through menus to find what you need.
Test #1: Rendering a New York–Style Loft
First, I rendered a design I created that emulates a New York–style loft. I asked the AI to add a cityscape view and switch the scene to nighttime. Here’s what I got in a matter of minutes:
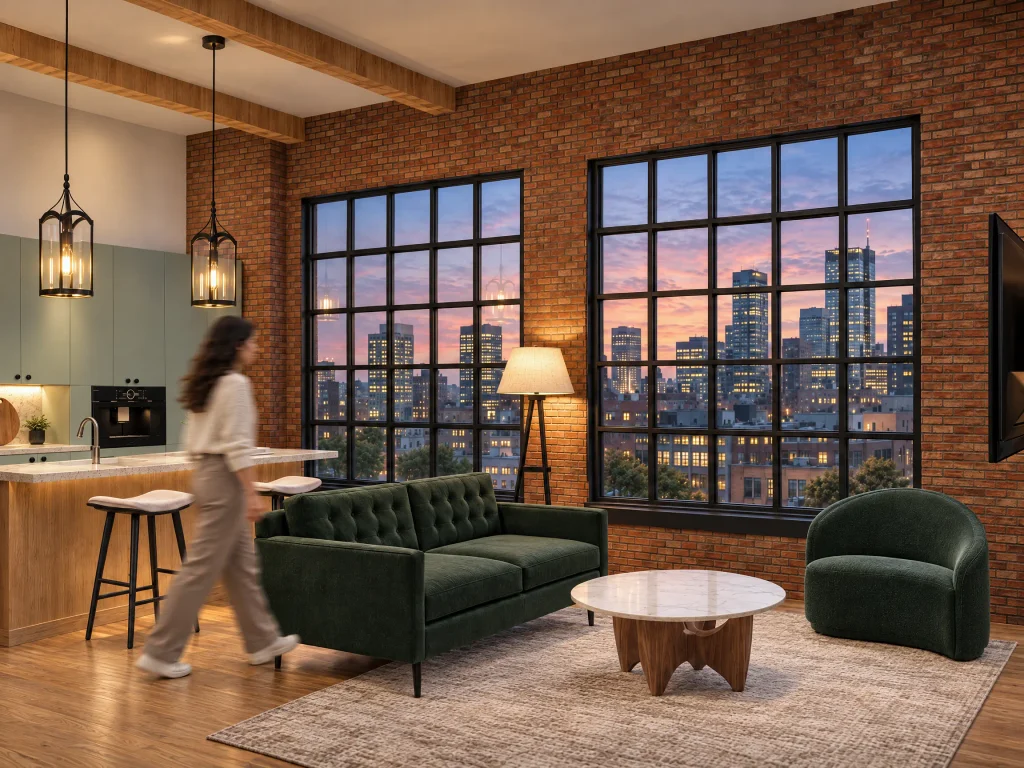
I was honestly super impressed. I especially love that it added a person into the scene. That’s something I don’t see most AI rendering tools do well, and it instantly makes the space feel lived-in and real.
Now this is a render that would sell a client.
The One Minor Flaw
The only flaw I found was some distortion on one of the kitchen cabinets and where the handles were placed. Other than that, I didn’t see any major changes to the integrity of the design, which is so important. A render that looks beautiful but misrepresents your actual design isn’t helpful in a client presentation, so I was relieved to see Vibe3D stayed true to the original layout and finishes. My tip: give fine details like hardware a quick check before you send renders to a client.
Test #2: Turning a Still Image Into a Fly-Through Video
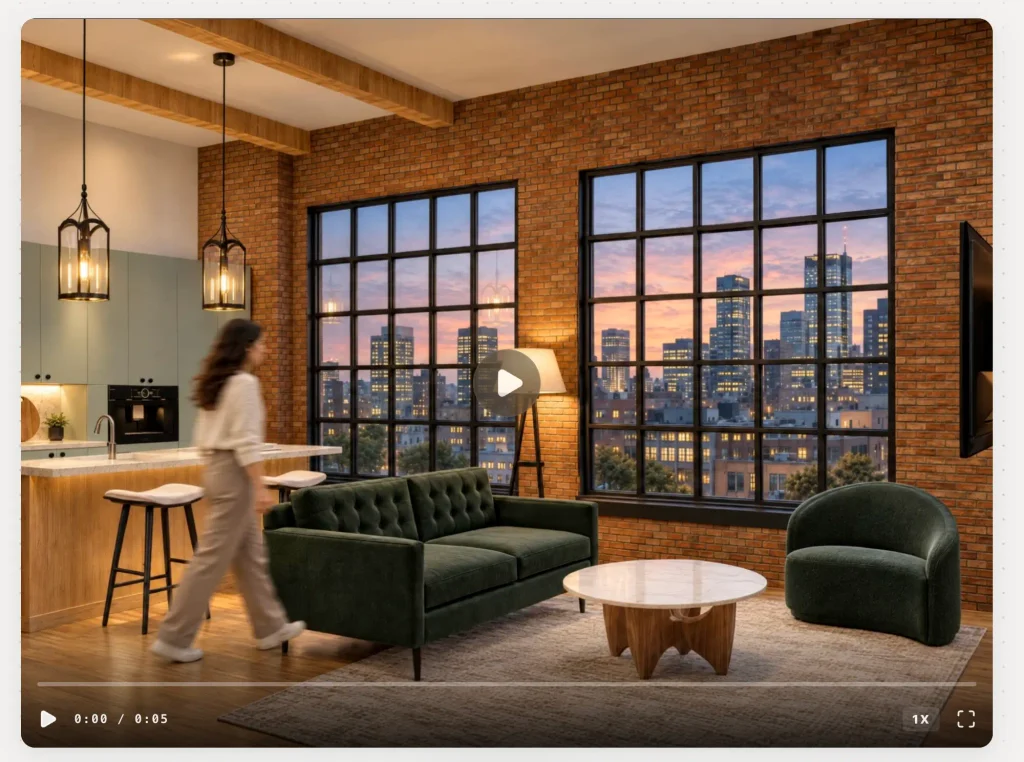
Next, I prompted the AI to create a fly-through video from the same image. This was the feature I was most curious about going into this Vibe3D review. You have the option of adding multiple images and even music, which is a great touch if you want to build a polished presentation.
I selected just the one image, and Vibe3D gave me a short video of the person it added walking through the space, complete with lighting effects. This was seriously impressive, and I immediately got excited about presenting my projects to clients this way.
Test #3: Bringing a Lacklustre Kitchen to Life
From there, I started rendering other scenes, including a kitchen design that looked lacklustre in its raw files. Here is the before and after:
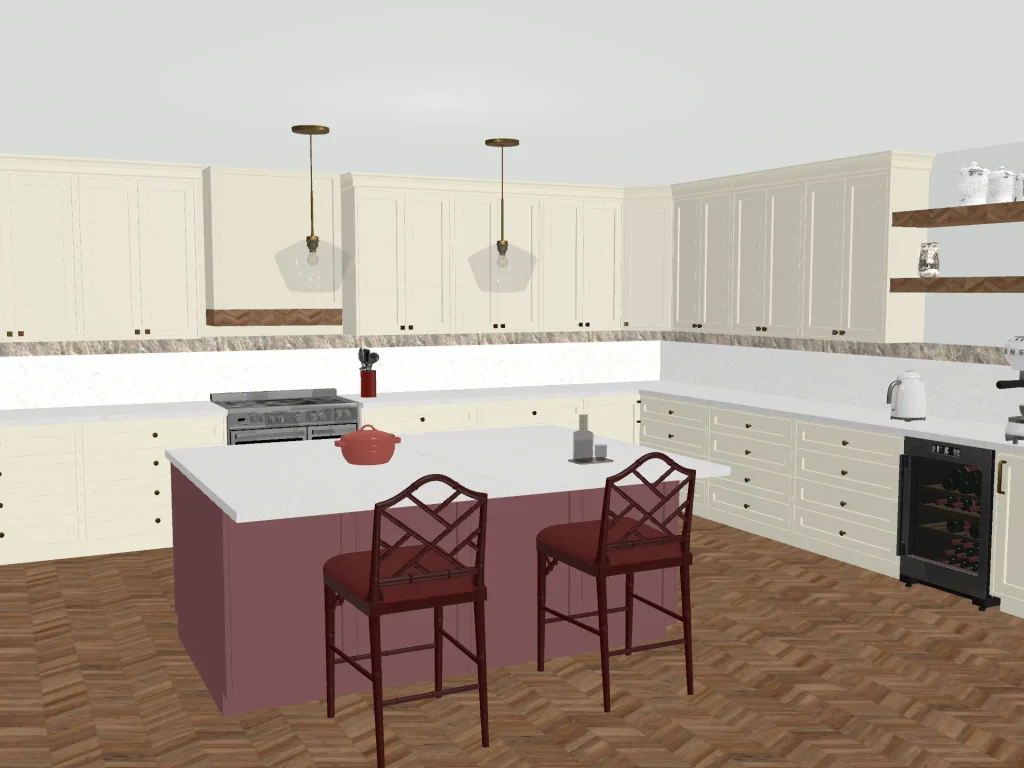
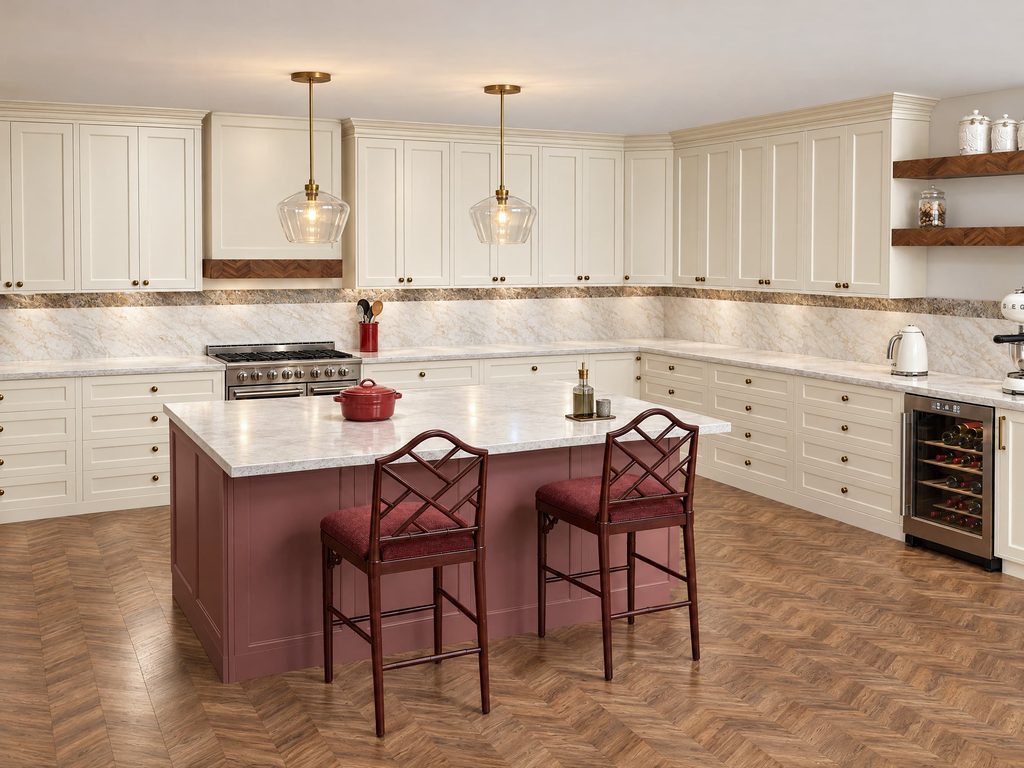
I rendered scene after scene, playing around with different lighting prompts and turning images into videos. I was gobsmacked at how easy it was and how high quality the renders were. No Photoshop, no endless stack of tools, and it was super easy to figure out. If there’s one takeaway from this Vibe3D review, it’s that ease of use is where this tool really shines.
Why Investing in Your Renders Matters
If you’re a designer looking to up your presentation game, you need to be investing in your renders. Most clients can’t read floor plans and flat 3D models the way we can. Good 3D rendering for interior designers isn’t a luxury anymore. A realistic, atmospheric render helps clients picture themselves in the space, builds trust in your vision and can be the difference between a hesitant client and a signed one.
Cinematic videos take that a step further. Watching someone walk through their future kitchen or living room is an experience a static image can’t match, and it makes your presentation feel elevated and memorable.
Vibe3D Review Verdict: Is It the Easiest Tool for 3D Rendering?
To wrap up my Vibe3D review: for me, the answer is yes. Vibe3D was seriously so easy to use. There’s very little guesswork, and no need to figure out how to place the lighting, set materials or any of that jazz. It’s plug and play, and it gives you high-quality renders that will sell your clients.
Vibe3D is officially my new favourite rendering tool.
PROMO CODE: Get 10% Off Vibe3D
If this Vibe3D review has you ready to try it, the team at Vibe3D is offering Spaces by Dee readers 10% off your first 3 months with code SPACESBYDEE. Be sure to use it, and let me know in the comments how your experience with this AI rendering tool goes!
Vibe3D Review FAQs
Can I use Vibe3D with SketchUp files?
Yes. You can build your model in Vibe3D, or export your SketchUp files and other 3D model files and bring them into Vibe3D just for rendering.
Can Vibe3D create videos from still images?
Yes. Vibe3D can turn a still render into a short fly-through video, and you can add multiple images and music to build a full presentation.
Do I need to download software to use Vibe3D?
No. Vibe3D works right in your web browser. Just upload your image and choose your scene settings.
Can Vibe3D add people to interior renders?
Yes. You can add people to your scene, which gives your renders scale and makes the space feel lived-in.
Click Here To Shop My Favourite Home Goods
Let’s design your space together, virtually.