How To Create a Vintage Gallery Wall
Vintage gallery walls are all the rage on Pinterest these days—and honestly, I can see why. This trend has been around for quite some time, and I recently created a vintage gallery wall in my own bedroom from my grandparents’ old passports, and I’m absolutely obsessed with.
So, naturally, I thought it was only fitting to share some of my tips for creating a vintage gallery wall of your own, from choosing the right pieces to arranging them in a way that feels collected, personal, and effortlessly layered.
AVOID COSTLY (AND UGLY) DESIGN MISTAKES
1. Plan Your Layout Before You Buy
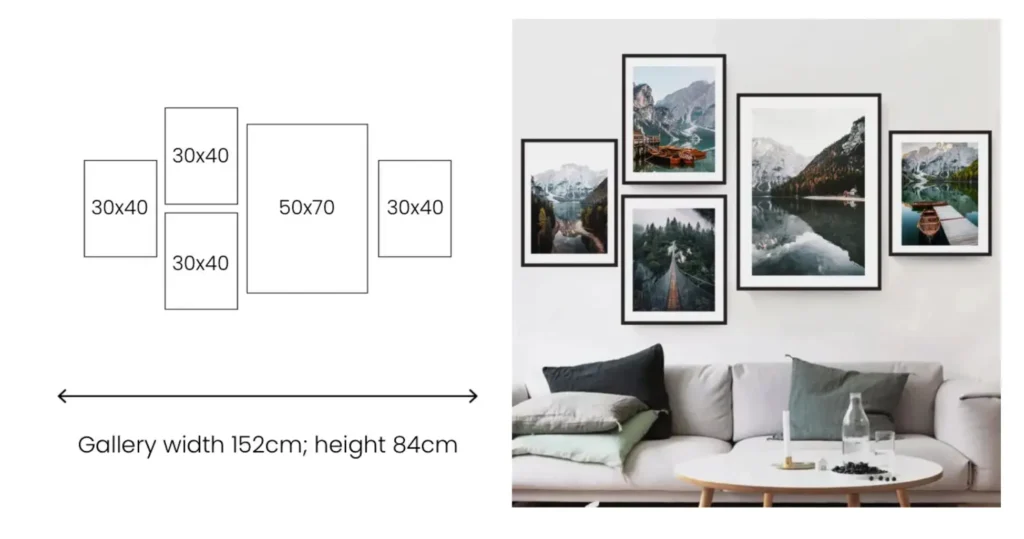
When it comes to creating a gallery wall, scale and proportion are everything. Before you start buying artwork, take a moment to think about how much space you actually want your gallery wall to occupy. There’s nothing worse than finding a collection of beautiful vintage pieces only to realize they’re all too small—or too large—for the wall you’re working with.
As a general rule of thumb, I like the overall gallery wall to span around half to three-quarters of the wall’s width. If your collection is much smaller than half the wall, it can start to feel a little lost and disconnected from the rest of the room. On the other hand, filling nearly the entire wall can sometimes make the arrangement feel overwhelming.
If you’re creating your gallery wall above a piece of furniture, such as a dresser, console, bench, bed, or sofa, you’ll also want to consider how the two relate to one another. Ideally, your artwork should be around the same width as the furniture below it or slightly narrower. You generally don’t want the gallery wall extending significantly beyond the furniture, as this can throw off the visual balance of the space.
Of course, there are always exceptions! You can absolutely create a beautiful oversized gallery wall that extends beyond the furniture underneath it, particularly if you’re going for a more eclectic or collected look. These aren’t strict rules—they’re simply guidelines to help you understand proportion and create a composition that feels balanced.
2. Hunt for The Perfect Vintage Pieces
One of the best things about creating a vintage gallery wall is that your artwork doesn’t have to come from a traditional art store. In fact, the more unexpected the source, the better.
If you enjoy the thrill of the hunt, start with places like estate sales, flea markets, antique shops, secondhand stores, and vintage markets. You never know what you might find tucked away in a box or sitting behind a pile of frames. And don’t overlook your own home—or your family’s homes. Your grandmother’s closet, an old family photo album, or a box of forgotten keepsakes can be the perfect place to find pieces with a story behind them.
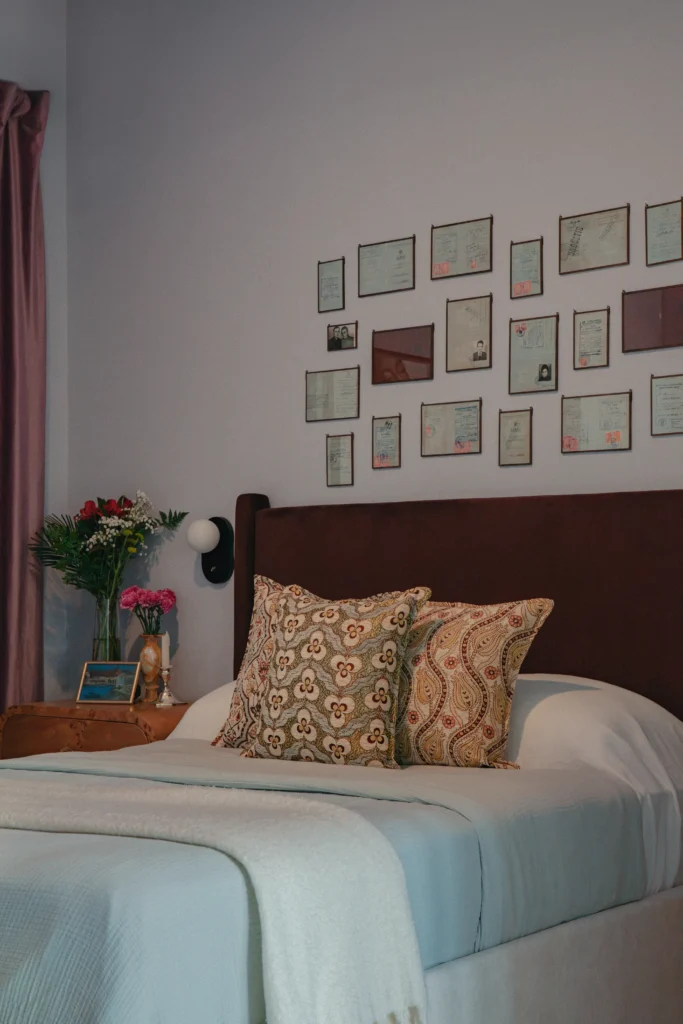
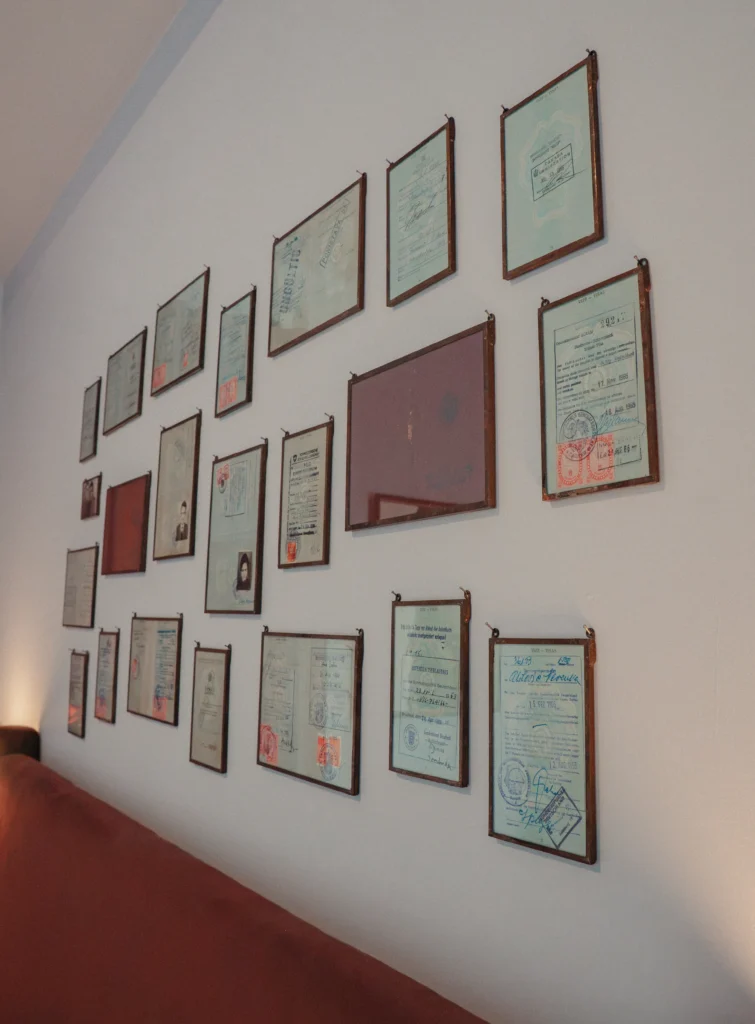
A vintage gallery wall is also a beautiful way to incorporate family heirlooms and sentimental pieces into your home. That’s exactly what I did in my own bedroom, where I used pages from my grandparents’ old passports to create a meaningful gallery wall. Framing old family photographs, postcards, handwritten notes, maps, or other paper keepsakes can give your gallery wall a personal history that you simply can’t recreate by buying everything new.
The best Places to shop for vintage art
And if you’re not much of a vintage hunter, don’t worry—you can still achieve the look without spending your weekends digging through estate sales. Online marketplaces such as Etsy are fantastic for sourcing vintage artwork, while retailers like Amazon and Anthropologie Home often carry vintage-inspired artwork and frames that can help you achieve a similar collected aesthetic.
When it comes to choosing the artwork itself, don’t be afraid to mix things up. Your gallery wall can be completely eclectic, combining different colours, mediums, frames, eras, and subject matter, or you can create something more cohesive by sticking to a specific color palette, frame style, or artistic theme. Think about the overall feeling you want the room to have and let that guide your choices.
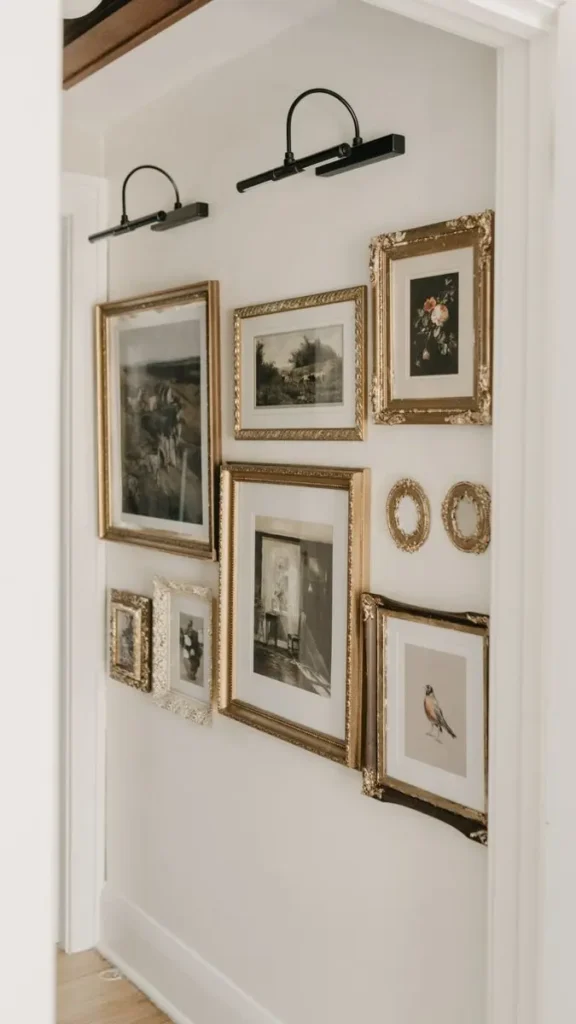
And if you really want to make your gallery wall a focal point, consider adding picture lights. A small picture light above the arrangement can beautifully highlight the artwork, create a warm glow in the evening, and make the entire wall feel more intentional and elevated.
Ultimately, the goal isn’t to make every piece match. It’s to create a collection that feels collected rather than decorated—as though you’ve gathered these pieces over time, each with its own story to tell.
3. Install The Collage (The Easy Way)
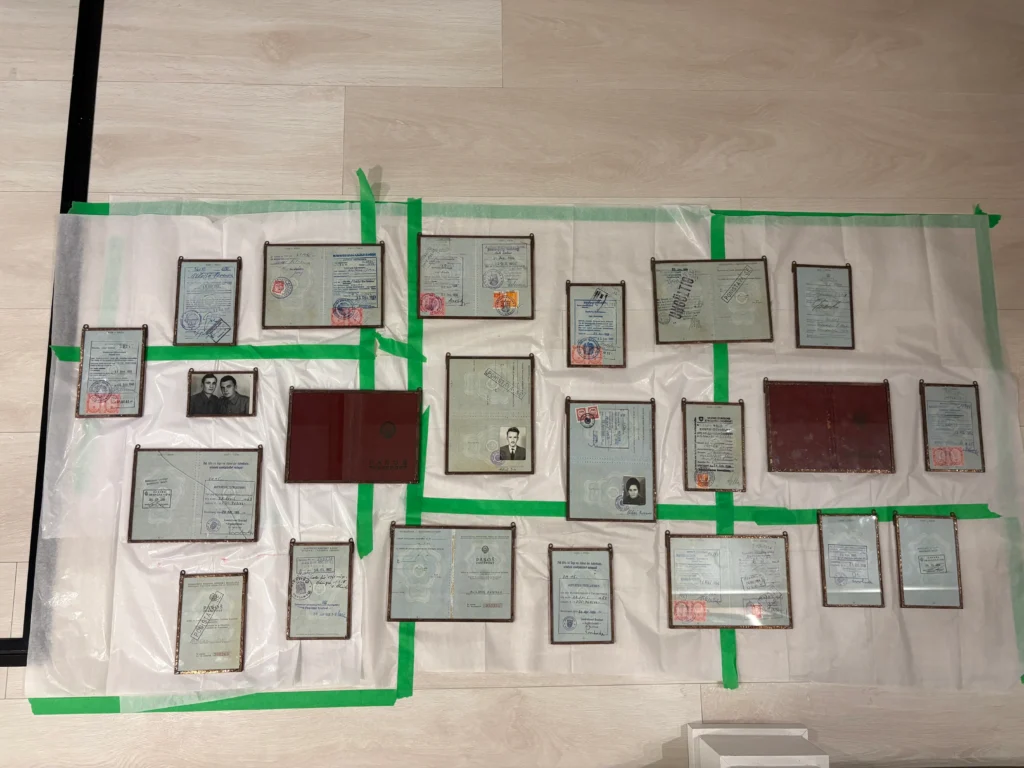
When it comes to actually installing your gallery wall, one of the easiest methods I’ve found—and the method I used for my own vintage gallery wall—is to create a full-size template before putting anything on the wall. This takes a little extra time upfront, but it makes the installation process so much easier and helps avoid a wall full of unnecessary nail holes!
First, I cleared a large section of my floor and used painter’s tape to mark out the approximate size and shape I wanted my gallery wall to span. I then laid tracing paper over the entire area (as you can see I had to tape several sheets of tracing paper together to create one large piece).
CREATE AN ART TEMPLATE
From there, I started arranging each piece on top of the tracing paper. This is where you can really play around with your composition. I moved pieces around, experimented with different spacing, and tried different combinations until I found an arrangement I was happy with.
For my own vintage gallery wall, I used pages and pieces from my grandparents’ old passports. I had each piece framed and fitted with hanging rings on the back so they could easily be mounted to the wall. See more of that project here.
Once I had finalized the arrangement, I used a pencil to mark the exact location of each nail directly onto the tracing paper. This meant I didn’t have to measure and re-measure every single piece once I moved the layout onto the wall.
I then carefully transferred the entire template onto the wall above my bed and secured it in place. From there, I simply hammered the nails through the marked points and hung each framed passport page in its designated spot.
Once everything was hung, I carefully pulled away the tracing paper—and there it was! A perfectly arranged gallery wall that matched the layout I had created on the floor.
Click Here To Shop My Favourite Home Goods
Let’s design your space together, virtually.